Selecting an installation location for your infrared heater isn’t difficult once you understand the basics but it does require a little more consideration than you might give for a convection-based product. This is because infrared heats spaces in a fundamentally different way, and for people new to this heating method, it can be difficult to shake off the mindset that comes from a lifetime of using conventional systems. If you’re wondering where to install infrared heaters for greatest effect, this blog explains it all.
Why is Infrared Placement Important?
One of the key differences between radiation and convection is the heat transfer process. Most of us are already familiar with the convection cycle of warm air produced by standard home heating systems but it’s important to understand that infrared products don’t work this way.
Infrared radiation is a direct heating method, which travels from the source until it is absorbed by a solid object. This is part of the reason infrared products are so efficient because the type of heat they produce is unaffected by air movement and can’t be lost through draughts. However, the direct nature of infrared radiation means that it also has to be directed toward the right place. Convection products work by warming the total air volume within a given space and can be placed almost anywhere to do this but infrared products require an unimpeded line of sight to the area that needs heating. In the A-to-B heat transfer of infrared, any objects placed in the way of the heater’s line of sight will end up being the recipient of this warmth rather than the intended area, making the system work less efficiently.
Common Mistakes for Infrared Heater Placement
So, how does this work in practice? Let’s look at an example living room to determine the best and worst locations for an infrared panel. This room has a fairly uniform layout, although it also has two alcoves and a bay window that need to be taken into account.
Installing in Alcoves
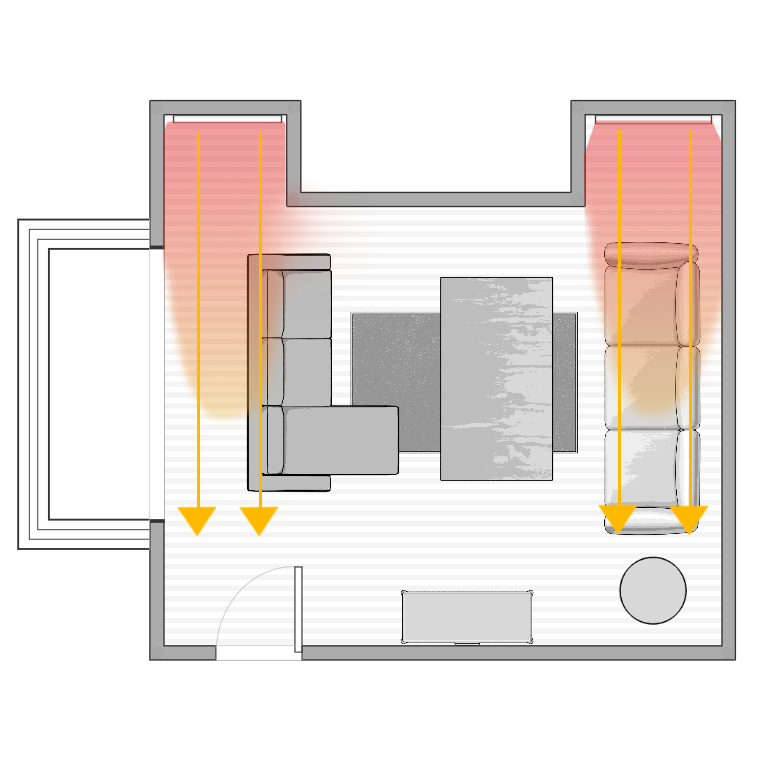
Don’t be tempted to install infrared heaters in annexes to keep the heaters out of the way. As you can see from the above image, the surrounding walls are preventing the infrared panels from providing their fullest spread of heat, so even though they are pointed toward key seating areas, it’s the alcove walls that are feeling the most benefit rather than the main room space. The great benefit of infrared panels is that they don’t monopolise room space in the way that conventional heaters do so there’s no need to keep them in an out-of-the-way location. In fact, their unusual designs and modern aesthetic can allow them to function as an eye-catching room feature in and of themselves.
Installing Opposite Windows
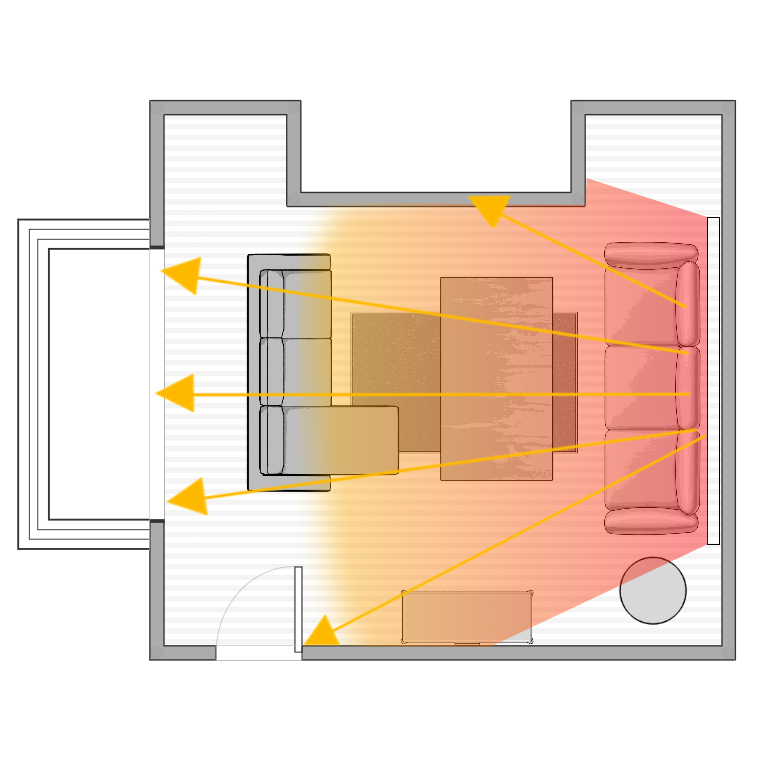
In the above image, a larger infrared panel is placed on the wall above the sofa and is pointing toward the bay windows. The panel has more freedom to spread its heat and will cover a much greater area of the room but this positioning does have its drawbacks. Less heat will reach the sofa furthest from the wall, creating a greater disparity in temperature between the two seating areas. Furthermore, there are some schools of thought that advise against positioning panels toward widows.
Heat loss though windows does not occur in the way you might expect: the longer wavelengths of far infrared are actually unable to pass through glass in the same way visible light does, so in this respect, the heat will be contained within the room. Heat loss occurs as the glass absorbs the far infrared radiation, which then conducts through the glazing and is emitted outside. As glazing doesn’t offer the same levels of insulation as a brick wall, heat can be lost more quickly in comparison. This should not be an issue for homes with modern glazing as most windows are better insulated and are designed to reflect heat back into the room, however, homes with older single-glazed windows may want to consider positioning their panels differently.
Best Locations for Infrared Panels
By discounting the alcoves and the window-facing wall as potential installation locations, this leaves us with the chimneybreast and the wall space adjacent to the door.
Wall Mounted Infrared Heaters
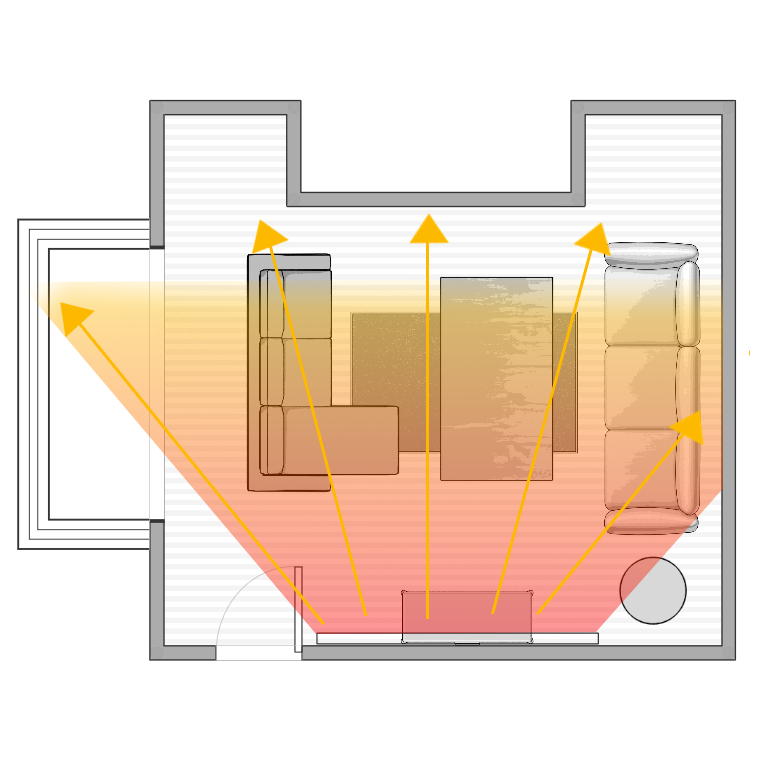
By placing an infrared panel on this wall, more of the heat is directed into the room and will be absorbed and retained by the surrounding furnishings and walls. While there may be some minor loss through the windows, this is minimised by ensuring the panel is not directly facing the glazing.
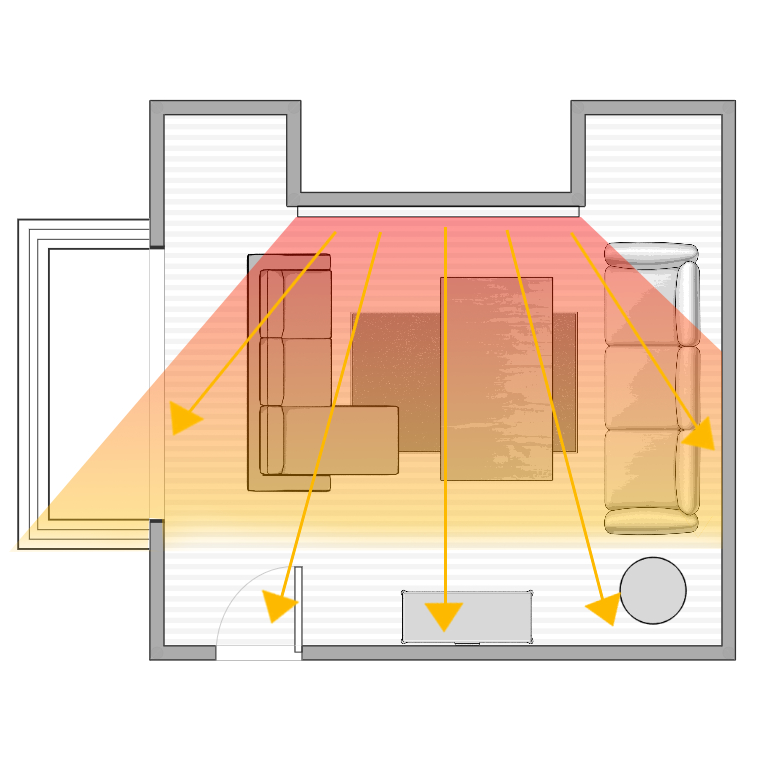
Mounting the infrared panel onto the chimneybreast may be the best option for this particular room, as the main occupancy area will receive the lion’s share of the radiant warmth whilst directing the remainder into the room at the same time. In this model, less heat is also used on the little occupied space around the door and the bookcase.
Ceiling Mounted Infrared Heaters
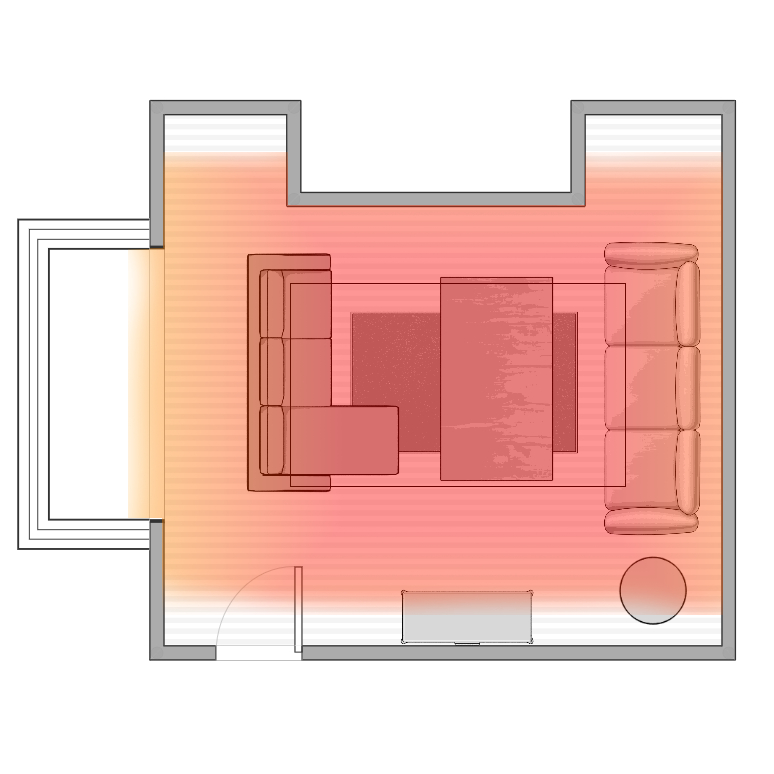
For a completely unhindered spread of heat, ceiling mounting your infrared panels is the way to go. Pointing your infrared panel down toward the floor ensures that living levels are always comfortably heated and all of the warmth created will be absorbed and re-emitted by the floor, walls and furniture. Ceiling mounted infrared panels also have the additional benefit of being completely out of harm’s way, so accidental contact with the surface of the heater is completely prevented. Naturally, you will need to take into account the position of any light fittings, as most rooms will have the main light near the centre of the ceiling. If we assume this is the case in the room layout above, it may be easier to have two smaller panels mounted either side of the central light to ensure both seating areas are well heated.
Location, Location, Location
Positioning soon becomes a simple matter of common sense once you understand how infrared works. Room corners, oversized furniture and grandiose objets d’art can all be obstacles that hinder your infrared panel’s path to efficient heating. The easiest way to approach installation is by asking yourself ‘where does my heater have a direct line of sight to?’ because if the panel is blocked, the heat will be too.
The images above are for illustrative purposes only and don’t take into account the difference between wattages or panel type. As rooms come in all shapes and sizes, you may find that you are better served by multiple panels of different sizes rather than by one high wattage panel, especially if your space has a particularly unusual layout.
If you’re thinking of installing infrared panels, be sure to contact our helpful sales team for a free quote tailored to your precise room dimensions. No matter whether you’re re-fitting the heating system for your lounge or installing infrared panels throughout a multi-storey office, our heating experts are always on hand to provide guidance with your project.
Image Sources:
https://www.homestyler.com
